Banana Snickerdoodle Ice Cream

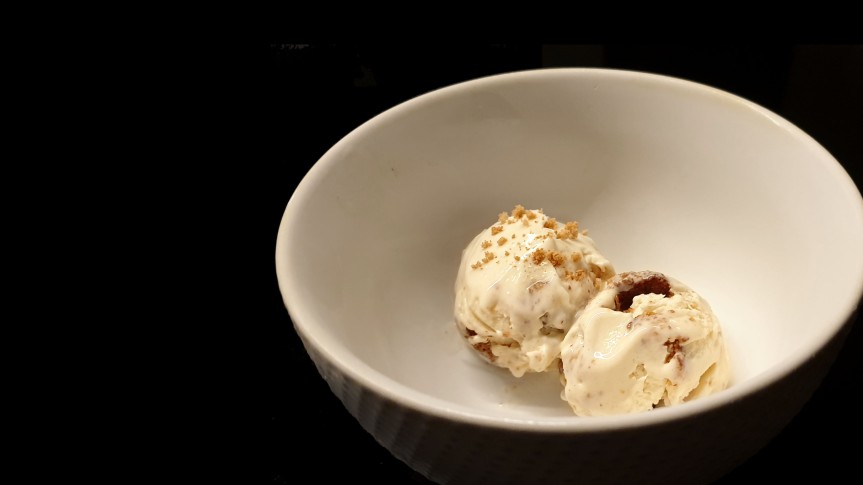
This ice cream has a strong banana flavour, while maintaining perfect creaminess. This is achieved by steeping bananas in milk and cream overnight, and throwing away the flavourless banana pulp. That way you get maximum banana flavour without compromising the ice cream texture with actual banana.

And of course you got to add some crunch with bits of snickerdoodle cookies throughout the ice cream. Banana and cinnamon (and I threw in some five spice powder in too after raiding my mother’s spice pantry why not) is a great combination, and these cookies remain crunchy even after freezing. There’s extra cream of tartar and baking soda in these cookies, resulting in a puffier cookie so they don’t become super hard after freezing.

This ice cream was a big crowd pleaser, even winning over the cinnamon-hater (there’s always one). It is probably one of my top 3 favourite ice cream flavours that I’ve made (together with pistachio and blue cheese and pear).

The recipes for the ice cream base and cookies were from Salt and Straw’s Ice Cream Cookbook, and the method of steeping bananas in milk is from Stella Parks.

Ingredients

Ice cream base

  • 1/2 cup sugar (100g)
  • 2 tbsp dry milk powder (12g)
  • 1/4 tsp xanthum gum (see notes)
  • 2 tbsp light corn syrup (45g)
  • 1 1/3 cup whole milk (315g) – might need a tiny bit more (about 10g) to top up any liquid absorbed by the bananas
  • 1 1/3 cup heavy cream (300g) – might need a tiny bit more (about 10g) to top up any liquid absorbed by the bananas
  • 4 large ripe bananas, thinly sliced (maybe about 330g-ish? idk I didn’t actually weigh my bananas)
  • 1/4 tsp five-spice powder (optional, but really brings out the banana flavour)

Snickerdoodle cookies (will make more than you need but I didn’t feel comfortable reducing this recipe any futher)

  • 4 tbsp unsalted butter, room temperature (57g)
  • 1/2 cup granulated sugar (100g), plus 1.5 tbsp for rolling the cookies in
  • 1/2 large egg (just weigh the contents of one cracked egg and divide by 2)
  • 3/4 cups all-purpose flour (94g)
  • 1 tsp cream of tartar
  • 1 tsp salt
  • 1 1/2 tbsp cinnamon

Method

Banana milk and cream

  1. About 2 days before churning the ice cream: Combine the milk and sliced banana into a saucepan and bring to a simmer over medium heat, scraping along the bottom occasionally to prevent scorching. Once it comes to a simmer remove from heat, cover, and let cool to room temperature. Then refrigerate overnight.
  2. The next day, bring the banana milk back to a simmer over medium heat, then strain to remove the banana pulp, pressing on the pulp to release extra liquid. (You can reserve the pulp to make a muffin or something).

Ice cream base (the day before churning the ice cream)

  1. Weigh the banana milk and cream, and top up to 615g with a 1:1 mixture of milk and cream. Transfer to a saucepan and add corn syrup. Stir well.
  2. In a small bowl, combine the sugar, milk powder, five spice powder, and xanthum gum and mix well.
  3. Add the sugar mixture into the saucepan and whisk until smooth. Heat over medium heat, stirring often and adjusting the heat to prevent a simmer, until the sugar has fully dissolved (about 3 mins). Remove the pot from the heat.
  4. Whisk in the cream and transfer the mixture to an airtight container and refrigerate (at least 6h but ideally 24h).

Snickerdoodle cookies (start the day before churning the ice cream)

  1. In a large bowl, beat the butter and 1/2 cup sugar until light and fluffy, and a shade lighter.
  2. Add the egg and mix until combined.
  3. In a separate bowl, whisk the flour, cream of tartar, baking soda, and salt to make sure there are no lumps.
  4. Add the flour mixture to the butter and mix until flour is incorporated and you have a crumbly dough.
  5. Press the dough together to form a disk, cling film, and refrigerate until chilled, at least 2h or ideally overnight.
  6. When ready to bake, heat the oven to 375°F/190°C. Line a sheet pan with baking paper.
  7. Mix the remaining 1.5 tbsp of sugar and cinnamon together in a bowl until thoroughly combined.
  8. Roll the cold cookie dough into golf-ball-sized balls. Coat the cookie balls in the sugar-cinnamon mixture, and transfer to the prepared sheet pan, leaving about an inch between the cookies.
  9. Bake in the preheated oven, rotating the sheet pan halfway through the baking time, until the cookies are golden around the edges and the tops crack, about 20 mins.
  10. Transfer to a cooling rack and let cool completely. Crumble the cookies to 1/4-1/2 inch pieces. The cookies can be stores in an airtight container at room temperature for 1 week.

Assembly

  1. Pour the ice cream base into an ice cream maker and turn on the machine, and churn until the mixture has the texture of soft-serve.
  2. When the ice cream is ready, transfer a layer of ice cream into a freezer-friendly container. Add the cookie pieces, distributing evenly across the ice cream. Repeat with a layer of ice cream, then the cookies again. (If you use a wide and shallow container, like me, just do 2 layers of each).
  3. Cover the ice cream with parchment paper (to prevent freezer burn), pressing it to the surface of the ice cream so it adheres, and cover with a lid.
  4. Freeze the ice cream until solid.

Notes

  • Xanthum gum is a thickener/stabiliser commonly used in vegan/gluten-free baking, so that’s where you might find them in the supermarket. Bob’s Red Mill brand is one of the more common brands.
  • If you’re using an ice cream maker which bowl needs to be frozen beforehand, make sure to cover the bowl with clingfilm so ice crystals won’t form in the bowl and cause your ice cream to have a sandy texture. Also to be safe, freeze the bowl for at least 2 days and at the coldest setting your freezer will go.
  • My ice cream maker takes about 20-30 minutes to reach soft-serve consistency.

Banana Pudding Tartlet

So much banana flavour.

This is by far the best method I’ve found of making some sort of banana-flavoured cream. I’ve previously tried making a banana curd, but the curd lost its banana flavour slightly over time. Not this banana cream though. Steeping milk in banana overnight really helps extract loads of banana flavour into the milk. You can then incorporate the banana milk into any recipe you want and not have to worry about the impact of incorporating the banana itself.

I used my usual sweet tart base and filled it with a banana pudding. I then mixed the pudding with some cream to lighten it and use it as a topping, and garnished the whole thing off with a Nilla wafer to invoke the classic banana pudding.

The banana pudding recipe is from Stella Parks.

Ingredients (makes about 8 tartlets, maybe 9 if you’re really good at re-rolling out the dough. Each of my tartlet was 3.2 inches/8cm in diameter)

Sweet tart dough

  • 128g unsalted butter, room temperature
  • 100g sugar
  • 1/8 tsp salt
  • 2 large eggs, room temperature (1 egg will be used for the egg wash)
  • 250g all purpose flour

Banana Pudding

  • 400g milk (any percentage)
  • 230g peeled, ripe banana, sliced (slightly less than 3 medium bananas)
  • 100g sugar
  • 18g cornstarch
  • 1g salt
  • 1/8 tsp ground cloves
  • 70g egg yolk
  • 1 tsp vanilla

Finish

  • About 1 cup heavy cream
  • Nilla wafers

Method

Sweet tart dough

  1. Beat the butter, sugar, and salt together until smooth.
  2. Mix in the egg until fully combined.
  3. Add flour and mix gently. Put in the fridge for a bit to firm up if too soft to work with at any time.
  4. Roll out the disc on a lightly floured surface until 3mm (1/8 inch) thick, rolling from the center toward the edge in all directions. Lift and rotate the dough a quarter turn after every few strokes, dusting underneath as necessary to discourage sticking, working quickly.
  5. Cut a circle of dough about 2 inches larger than your tartlet ring, easing in into the bottom and sides of your tartlet mould. Trim off any excess dough off the top.
  6. Put the pastry shell in a refrigerator until firm, about 15 mins.
  7. Meanwhile, preheat oven to 325°F/160°C.
  8. When the oven has preheated and your pastry shell has firmed up, dock the bottom and sides of the tarts with a fork (poke holes in it).
  9. Bake for about 10 mins. The tart should look lightly coloured, dry and opaque. Meanwhile, beat 1 large egg with a pinch of salt.
  10. After 10 mins, remove shells from oven and lightly brush the bottom and sides with the egg wash. Return to oven and bake until golden brown, about 20 mins longer (see notes).
  11. Let cool completely. Wrap it well and keep in a refrigerator for up to 1 week, or in the freezer for up to 2 weeks.

Banana pudding

  1. The night before: Combine the milk and sliced banana into a saucepan and bring to a simmer over medium heat, scraping along the bottom occasionally to prevent scorching. Once it comes to a simmer remove from heat, cover, and let cool to room temperature (about 4h). Then refrigerate overnight.
  2. The next day, bring the banana milk back to a simmer over medium heat, then strain to remove the banana pulp, pressing on the pulp to release extra liquid. (You can reserve the pulp to make a muffin or something).
  3. Using the same saucepan (no need to wash), whisk together the sugar, cornstarch, salt, and cloves until well combined. Then whisk in the egg yolks. Then whisk in the banana milk. Heat over medium-low heat, whisking gently, until custard is steaming hot, about 5 mins.
  4. Increase heat to medium and continue cooking until custard thickens, about 5 minutes longer. When it starts to bubble, set a timer and continue whisking for 90s (see notes).
  5. Take the custard off the heat and stir in vanilla.
  6. Strain custard through a sieve again to make the custard extra smooth.
  7. Pour the custard into the tartlet shells, and reserve extra custard.

To finish

  1. Make some whipped cream by whisking the heavy cream to stiff peaks. Eyeball the volume of the remaining custard and fold in whipped cream at about a 1:1 ratio by volume, or to taste. Pipe the lightened custard on top of the tartlet in a spiral.
  2. Garnish with a Nilla wafer.

Notes

  • If you use a perforated tart ring like me, you can use a sharp knife to scrape off any bumps left behind by the perforation.
  • The egg wash in the middle of baking the tart shell helps with preventing a soggy bottom.
  • Whisking the custard when it bubbles is important to neutralize starch-dissolving protein found in egg yolks, so your custard remains thick.

Mont Blanc Tartlet (Chestnut Tartlet)

A beautiful dessert perfect for winter.

This dessert is supposed to look like the Mont Blanc mountain – sometimes this look is helped along by whipped cream on top the chestnut cream strands, but I decided to go the route of whipped cream inside the dessert and powdered sugar on top instead. Also I used special non-melting powdered sugar made of mysterious chemicals to achieve the snow look.

The tart base itself is a sablé biscuit base filled with frangipane, or almond cream. So you get a nice delicate sweetness in the base and the crumbliness of the sablé biscuit, combined with a chestnut cream infused with the aroma of rum, lightened up with a bit of whipped cream.

The original recipe I adapted this from started from raw chestnuts, but I found some shelled roasted chestnuts in Costco, so the recipe below is starting from that instead.

Ingredients (makes 5-6 tartlets, 3″ large. Basically you can make 6 if you’re good at rolling the sable biscuit base out)

Soaked chestnuts

  • 300g water
  • 160g sugar
  • 300g shelled, roasted chestnuts (if you’re starting from raw you’d have to boil the chestnuts longer, see the original recipe for how)
  • 38g dark rum

Sablé biscuit base

  • 110g cake flour
  • 50g powdered sugar
  • 12g ground almonds
  • 100g unsalted butter, cold
  • 1 large egg yolk

Frangipane

  • 73g unsalted butter, softened to room temperature
  • 73g powdered sugar
  • 73g ground almonds
  • 2 eggs
  • 10g cake flour

Chestnut cream

  • 200g soaked chestnuts from the first part of this recipe
  • 30g brown sugar
  • 10g corn syrup
  • 10g sweetened condensed milk
  • 70g milk
  • 40g heavy cream

Finishing

  • 200g cold heavy cream
  • 14g sugar
  • Non-melting icing sugar, or if you’re serving immediately you can get away with just regular icing sugar

Method

Soaked chestnuts (make 2-3 days in advance)

  1. Mix the water, sugar, and chestnuts in a saucepan and heat over medium-high heat until the liquid simmers, stirring occasionally to make sure everything is mixed.
  2. Once the liquid just starts to simmer, add a drop lid, lower the heat to medium-low, and maintain a simmer for 20 mins.
  3. Transfer everything into a container and add the rum.
  4. Cover and refrigerate for 2-3 days.

Sablé biscuit base

  1. In a food processor, pulse together the cake flour, powdered sugar, ground almonds, and butter until homogeneous.
  2. Add the egg yolk and pulse until a smooth dough forms.
  3. Tip out onto a surface, knead very briefly for the dough to come together, and then flatten the dough and wrap in clingfilm. Refrigerate for 30 mins for the dough to firm up. Meanwhile make the frangipane.

Frangipane

  1. In a mixing bowl, mix together the butter and powdered sugar. You want to mix the butter and sugar until it is very light and airy, almost white in colour and stiff enough to stay on your whisk when you remove the whisk from the bowl. If the butter is too cold for this to happen you can briefly place your mixing bowl over some hot steaming water, but make sure not to melt the butter.
  2. Add the ground almonds and mix well until incorporated.
  3. Add the eggs and mix well until incorporated.
  4. Sift in the cake flour.
  5. Transfer to a piping bag and refrigerate.

Sablé biscuit tartlet

  1. Arrange your tartlet molds (I used this one) onto a baking sheet lined with baking paper. Grease the inside of the mold with a bit of softened butter.
  2. Roll out the sablé base into a thin layer, about 0.5cm thick, and cut out circles slightly larger than your tartlet mold. Press the sable base into the tartlet so it is a thin layer, and trim off any excess dough.
  3. Dock the bottom of the tartlet with a fork, and repeat steps 2-3 for all the tartlets. You can reroll the sable base if you need, and refrigerate the sable base if it gets too difficult to work with.
  4. Place all the tartlets into the refrigerator for 30 mins. Meanwhile preheat the oven to 160°C/320°F.
  5. After 30 mins, pipe the frangipane into the tartlet base until it’s nearly to the top of the tartlet. Use the back of a small spoon to even out the frangipane.
  6. Bake the tartlets for 30-35 mins, or until the frangipane is lightly golden brown. While the tartlets are baking make the chestnut cream.

Chestnut cream

  1. Roughly dice up 200g of the soaked chestnuts (make sure to keep the remaining soaked chestnuts whole for finishing the tartlet).
  2. Place the diced chestnuts into a food processor and pulse.
  3. Add 30g brown sugar and pulse until a smooth paste forms, stopping and scraping down the food processor occasionally to make sure everything is incorporated.
  4. In a separate bowl, mix the corn syrup and sweetened condensed milk, heat briefly in a microwave for 10s, and then add into the chestnut paste in the food processor and pulse until incorporated.
  5. Add 70g milk gradually, pulsing the chestnut cream well in between each addition.
  6. Scrape the chestnut paste through a sieve.
  7. Add 40g heavy cream to the sieved chestnut paste and mix well. You might need more heavy cream depending on your chestnuts, ultimately you want a pipeable consistency that’s stiff enough to still hold its shape.
  8. Transfer the chestnut cream into a piping bag fitted with a mont blanc tip (such as ateco 259). If like me you don’t have that tip, you can get away with a small circular tip and just piping more.
  9. Keep in refrigerator until ready to use.

Assembly

  1. When the tartlets are done baking, cool them completely to room temperature.
  2. When the tartlets have cooled, whip the heavy cream and sugar until stiff.
  3. Spread a thin layer of whipped cream onto the tartlet.
  4. Add a soaked chestnut in the center of the tartlet.
  5. Spread more whipped cream in a mountain shape over the tartlet.
  6. Pipe the chestnut paste in circles over the whipped cream, again aiming for a mountain shape.
  7. Decorate with a soaked chestnut on top and dust with powdered sugar.
  8. Store in an airtight container in the fridge.

Notes

  • You can easily make this recipe into a large tart instead! Maybe make 1.5x the recipe and bake for longer instead. You’d also have to decorate the tart differently.
  • The tartlet still held up well the next day but I wouldn’t store it for too long – I don’t know how long the whipped cream can hold up.
  • If you can’t find chestnuts I guess you could use chestnut paste and decorate the tartlet without the whole chestnuts, but the chestnut paste tends to be too sweet.

Chocolate Coffee Brownie Cheesecake

So many layers of brown.

Also how I successfully baked 2 cheesecakes in the same pan.

The coffee and chocolate cheesecake layers are separated by a crunchy brownie-like layer. The original recipe described it as a chocolate wafer layer but it totally just tastes like brownie to me. Adds a nice bit of crunch to the slice as well.

This makes a great shareable cake that’s so pretty to look at! The original recipe is from the old reliable Smitten Kitchen, I just halved the recipe and reworded it a bit to make it easier for me to understand.

Ingredients (gives 5 generous slices or 7-8 more reasonable sized slices)

Brownie

  • 98g all purpose flour
  • 20g Dutch-process cocoa powder
  • 100g granulated sugar
  • 1/4 tsp salt
  • 1/4 tsp baking powder
  • 58g unsalted butter, softened at room temperature
  • 1/2 large egg, room temperature (just weigh an egg and divide the egg by weight)
  • 1/2 tsp vanilla

Cheesecake

  • 340g block cream cheese, softened at room temperature
  • 100g granulated sugar
  • 2 large eggs, room temperature
  • 30g sour cream
  • 1/2 tsp vanilla
  • 58g bittersweet chocolate, melted
  • 1 tsp instant espresso powder
  • 1/2 tsp molasses

Chocolate ganache

  • 42g bittersweet chocolate
  • 2 tbsp heavy cream
  • 1/2 tbsp corn syrup
  • 1/2 tbsp cocoa powder

Method

Brownie layer

  1. Prepare the pan by lining a 9×13 pan with foil. Then either coat the foil with nonstick cooking spray or brush with a thin layer of melted butter. Then add a layer of parchment paper over the foil.
  2. Preheat the oven to 350°F/180°C.
  3. In a large bowl, beat the softened butter and sugar together until combined.
  4. Add the egg and vanilla and beat until smooth.
  5. Add the baking powder, salt, and cocoa powder and beat until combined.
  6. Add the flour and fold in until the flour is evenly incorporated. I had to go in with my hands at this point to coax the flour into the dough.
  7. Roll the dough out between 2 large pieces of parchment paper until very thin and about 9×13 inches in size.
  8. Place the dough in the freezer for about 5 minutes, until firm.
  9. Once firm, transfer the dough to the lined pan and press into the bottom layer of the pan, so you have a thin even layer at the bottom of the pan. It’s okay if the dough goes up the sides of the pan a little as the sides will be trimmed.
  10. Bake the brownie in the preheated oven for 10 minutes.
  11. Once the brownie is done, take it out of the oven and trim away any edges that went up the sides of the pan while the brownie is still warm, being careful not to cut through the foil. Also cut the brownie down the middle so you have 2 brownie pieces about 9×6.5″ in size.
  12. Let brownie cool.
  13. Once the brownie is cooled, use a piece of foil to create a barrier that will fit in between the 2 brownie pieces.
  14. Place the foil barrier in between the 2 pieces of brownie, and add another piece of parchment paper over the foil barrier as well so the cheesecake doesn’t stick to the foil. The brownie pieces should still be on top of everything (see the first picture).

Cheesecake layers

  1. You’re going to make a cheesecake base that you will then divide into two for the two flavours, so I recommend weighing an empty large bowl first so you can then divide the cheesecake base into two by weight.
  2. In a large bowl, beat the softened cream cheese with the sugar until light and fluffy.
  3. Beat in eggs one at a time until well incorporated, scraping down the sides and bottom of the bowl with a spatula in between each addition.
  4. Beat in sour cream and vanilla until well incorporated.
  5. Divide the cheesecake base into 2 by weight.
  6. In one half, add the melted chocolate, mixing until well incorporated. Pour this into one half of the pan, and use the back of a spoon to even out the cheesecake layer.
  7. To the other half of the cheesecake base, add the espresso powder and molasses and mix until smooth. You might have to let the espresso powder sit in the base for a minute first to let it dissolve. Pour this into the other half of the pan, and use the back of a spoon to even out the cheesecake layer.
  8. Bake in a preheated 350°F/180°C oven for 15-18 minutes, or until cheesecake is set around the edges but still jiggly in the middle.
  9. Cool the cheesecakes at room temperature, before transferring to the fridge to cool completely.

Assembly

  1. When the cheesecakes are fully cool, carefully pull out both cheesecakes onto a cutting board, peeling away the parchment paper and foil from the edges of the cheesecake until the sides are fully exposed.
  2. Remove the parchment paper and foil from the bottom of the coffee cheesecake layer. You can do this using a thin, long offset spatula but I found it easier to just use my hands and carefully wiggle my fingers under there.
  3. Supporting the cheesecake layers carefully so it doesn’t break, place the coffee cheesecake layer over the chocolate layer.
  4. Dip a sharp serrated knife in hot water and cut the layered cheesecake into half (so you get 2 fatter cheesecakes not 2 skinny cheesecakes). Stack one cheesecake block on top of the other.
  5. Trim off any ugly edges with the hot serrated knife. If you need to smooth out the sides use a piece of parchment paper and smooth it against the side with your hands. Place the cheesecake in the fridge to chill.
  6. Meanwhile to make the ganache, melt the chocolate, cream and corn syrup together in a microwave in 10s bursts, stirring well between each burst, until smooth. Then whisk in cocoa powder. You want the final glaze to be thick but pourable so add more cream if necessary.
  7. Pour the ganache over the top of the cheesecake, and use a spoon to coax it down the edges if you want a drippy effect. Refrigerate until needed.
  8. To serve, slice the cake using a hot serrated knife. The cheesecake is quite rich so thin layers are best.

Notes

  • If at any point the cheesecake feels too soft to cut, just stick it back in the fridge for 5-10 minutes before re-attempting.
  • My favourite method to melt chocolate is to just stick it in a microwave-safe bowl and microwave for an initial burst of 20s, then stirring well, then 10s bursts stirring well between each burst until the chocolate is almost melted, then reducing to 5s bursts.
  • The molasses is more for the coffee colour than the flavour.

Walnut and Brown Sugar Snail Bread

Continuing the trend of eating cute animals.

You can use any filling you want, I’ve also made this with chocolate chips rolled up in the middle.

But walnut and brown sugar is a combination that never fails.

And the antennae are fried spaghetti! Crunchy.

I got the idea from here, but used my own recipe.

Ingredients (makes 10)

Bread

  • 440g all purpose flour
  • 60g sugar
  • 8g yeast
  • 8g salt
  • 60g egg, beaten (and some extra egg for egg wash)
  • 60g milk, any percentage, room temperature
  • 120g water, room temperature
  • 80g butter, softened

Assembly

  • 1 1/2 cups walnuts, chopped (honestly I can’t remember how much I used, just use how much walnuts you want)
  • 1/2 cup brown sugar (or to taste)
  • Spaghetti (for the antennae, maybe like 6 sticks?)
  • Melted chocolate to decorate the faces

Method

  1. Mix the flour, sugar, yeast, and salt together in a bowl.
  2. Add the egg, milk, and water, and mix until just combined.
  3. Knead in the butter until dough is smooth and elastic. Continue kneading until the dough reaches windowpane stage.
  4. Cover the dough and let rise until doubled in size, about 1.5 hours.
  5. While the dough is rising, toast the walnuts in a preheated 180°C/350°F oven for about 5 minutes, or until toasted and fragrant. Let the walnut pieces cool.
  6. When the bread dough has doubled in size, knock down the dough, and split the dough into 2 balls, with one of the balls twice the size of the other. The bigger ball will be used to roll the shell, and the smaller ball will be the body of the snail. Keep the dough balls covered when you’re not actively using it.
  7. Roll out the bigger ball into a long rectangle, about 10 inches long.
  8. Sprinkle the walnut pieces and brown sugar over the rectangle.
  9. Roll up the rectangle from the long edge.
  10. Split the roll into 10 pieces. Lie each piece down, spiral side up. Choose the neater spiral side to be up.
  11. Take the smaller dough ball you left aside at step 6 and split into 10 pieces. Shape each dough piece to a tadpole shape, keeping the surface as smooth as possible. Tuck the tail of the tadpole under each spiral, so the head of the tadpole is the head of the snail (look at the pictures above if you don’t get what I mean lol)
  12. Cover and let rise until doubled in size again.
  13. Meanwhile, preheat the oven to 180°C/350°F.
  14. When the bread has risen, make a quick egg wash. I made this with the 1/2 egg I had leftover from the bread and 1 tsp water. Lightly brush the egg wash over the shell of the snails (the spiral part).
  15. Bake the bread for about 15 minutes, or until the bread is golden-brown and sounds hollow when you tap it.
  16. Let the bread cool on a cooling rack.
  17. When the bread has completely cooled to room temperature, melt some chocolate and use the chocolate to decorate the snails’ faces.
  18. Snap each spaghetti to an appropriate length (about 3 inches) and fry in some vegetable oil over medium heat until toasted.
  19. Insert each toasted spaghetti piece into the head of the snail to make the antennae.

Notes

  • All timings listed are a general guide. It’s better to follow the description (eg doubled in size) rather than the timings, as the timing depends on many factors like the activity of your yeast, or the surrounding temperature.
  • If you’re using active dry yeast instead of instant yeast, you might have to activate the yeast first. Warm up the milk that was supposed to go into the bread till it’s about body temperature, and then add the yeast into the milk. When the mixture is foamy (about 5-10 mins later), add the yeast-milk back into the bread at the step where the milk is supposed to be added.